The dark art of film scanning
Posted: December 5, 2014 Filed under: Miscellany | Tags: 120 film, analogue photography, film photography, photography, scanning 6 CommentsOne of the great things about film photography is that you always have the ultimate ‘raw file’ – your negative (or positive, if you’re shooting transparencies) – to go back to and rescan as needed. Scanning quality seems to be all over the board though, and is dependent not only on the equipment used, but also (and maybe most importantly) on the technician doing the scanning and the settings used and any adjustments that they might make.
I’ve mailed my film to several labs over the last few years for developing and scanning – North Coast Photo in Carlsbad, CA; Dwayne’s Photo in Parsons, KS; Citizens Photo in Portland, OR; and Precision Camera in Austin, TX. I’ve generally been quite happy with the results of lab scans, though there are some differences.
I’ve done a little bit of film scanning on my Epson V500 scanner and have found that I can get pretty good scans from 120 film, but I’ve not been happy with any scans I’ve done of the smaller 35mm film.
I’m going to start out showing some examples and talking about experiences I’ve had with North Coast Photo. I’ve been very impressed with their scanning of color and black and white negs, though I’m often torn between getting budget scans and the more expensive ‘enhanced’ scans. You’ll see the resolution differences between those below. Lately I’ve been using Dwayne’s if I want low-res scans at a much lower price, and North Coast if I want high-res scans. I recently discovered Precision and was very impressed with the scans at a price lower than North Coast (for color negs only, though – for black & white the price is about the same).
Sample image
Kodak Ektar 100 film (120 format) shot in my Rolleicord III
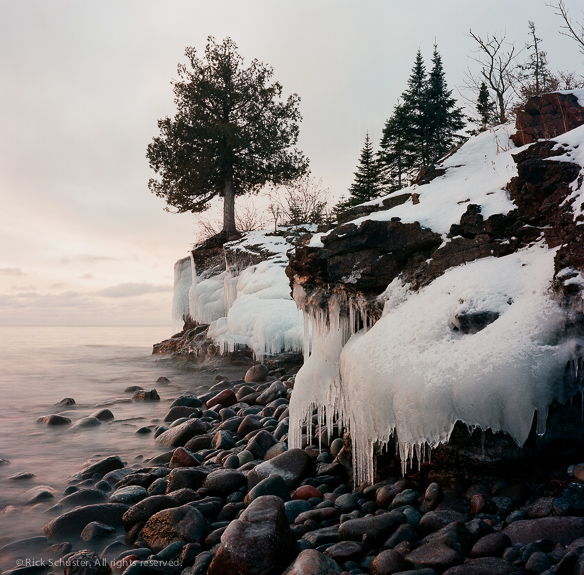
Here is the original scan done by North Coast Photo at the time of film processing, scanned as a ‘budget scan’, which currently costs $8.68 per roll in addition to the cost of processing ($6.90/roll). According to the metadata in the file, these budget scans are done on a Noritsu Koki scanner model QSS-32_33. Scans of 120 film shot at square 6×6 format come in at around 2079 x 2048 pixels (I’ll show pixel-level detail further down the page). This is the straight scan exported from Lightroom with no adjustments at all made to it:
1a
I was recently producing some 20 x 20 inch prints from images shot on 120 film, but the negs had been scanned as the low-res budget scans, so I needed larger files to print from. I mailed several negatives to North Coast to have them do their ‘enhanced scans’ of individual frames. The enhanced scans are done on the same scanner, but at a higher resolution, coming in at about 4824 x 4760 pixels for a square 6×6 image (I don’t know why it’s not the same number of pixels both dimensions). That’s a nice resolution for making large prints – at 20 x 20 inches, that equates to around 240 pixels per inch, which is adequate for very nice looking prints.
The enhanced scans cost $11.95 per roll on top of processing cost ($6.90/roll) if you have the whole roll scanned at the time of processing. For scans of individual frames not at the time of processing, they cost $2.25 per image (they call them ‘premium scans’ when they’re individual scans, but somebody at North Coast assured me they’re the same as the ‘enhanced scans’).
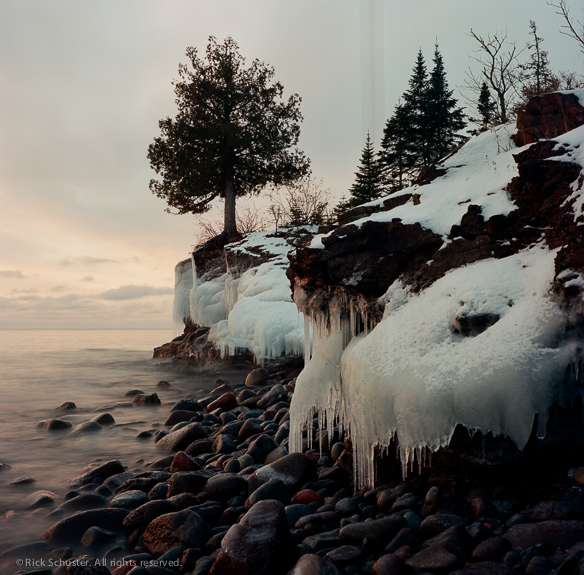
So I sent off a bunch of negs to have them done at once, and here’s the resulting scan that came back. Again, this is with no adjustments made to the image. You can see immediately how different the color and brightness of the scan is compared with the first scan:
1b
You’ll notice a strange streak in the sky in the scan above. I hadn’t seen this streak in the original scan, but in fact there was a streak on the negative. The same streak went through several images on the neg, and North Coast said it was likely from developing chemistry dripping down the negative as it hung to dry. If they had noticed it right away, they would have rewashed the negs before doing the first scans, but it had slipped by them. Mistakes happen, so I don’t fault them too much for this happening, and I have a feeling it’s a problem that’s very unlikely to happen. North Coast wanted to fix the situation, so I mailed the negs back to them and they rewashed the negs to see if they could get rid of the streak. Being it was about two years after developing, there was no guarantee that it would work, but they wanted to try. It worked on all but one image (where the drip had stopped and had created a thicker, darker spot). North Coast’s customer service is great and they seem very concerned about making sure their customers are happy and that things are done right. I did get stuck with paying for shipping the negs back to them though.
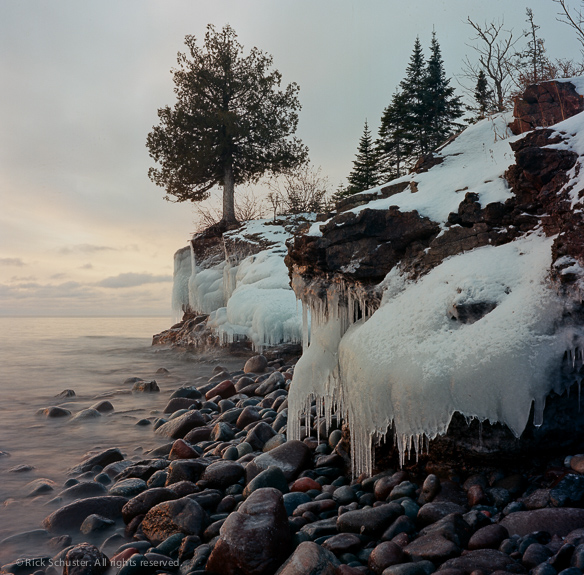
The scan below is the second enhanced scan that they sent back after washing the neg and rescanning. The odd thing to me is how different this scan looks compared to the one above. The colors look a little different than the one above, and the exposure on this scan is much lighter:
1c
This exercise brings me to the conclusion that there’s much more to scanning an image than just the equipment used. These were all done by the same lab on the same scanner, though the second two show a different version of scanning software used. The first one was done at a lower resolution and a couple of years prior to the other two, so I would expect there to be some differences. What surprised me most was the difference between the last two scans done just a couple weeks apart. What accounts for the variation? I would guess it’s the scanning technician and the settings they use on the scanner software.
I could probably use Lightroom to make adjustment to the white balance, exposure, etc, and get all three of these images to look pretty close to each other, but it would take some work.
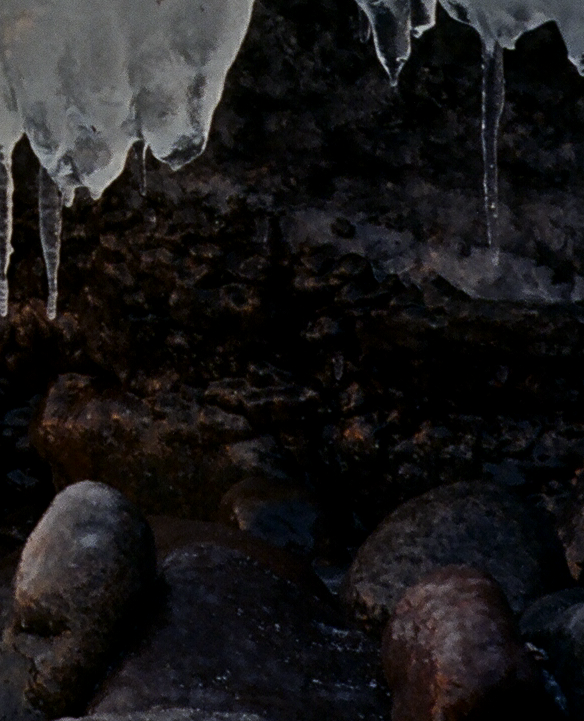
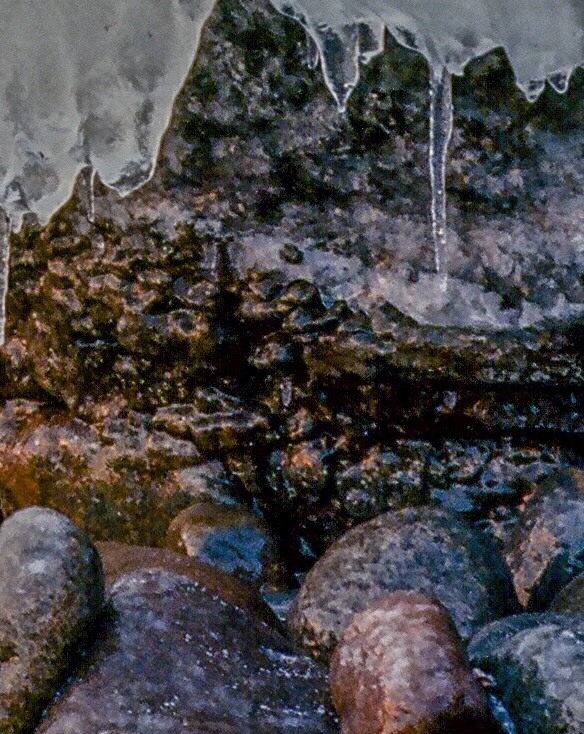
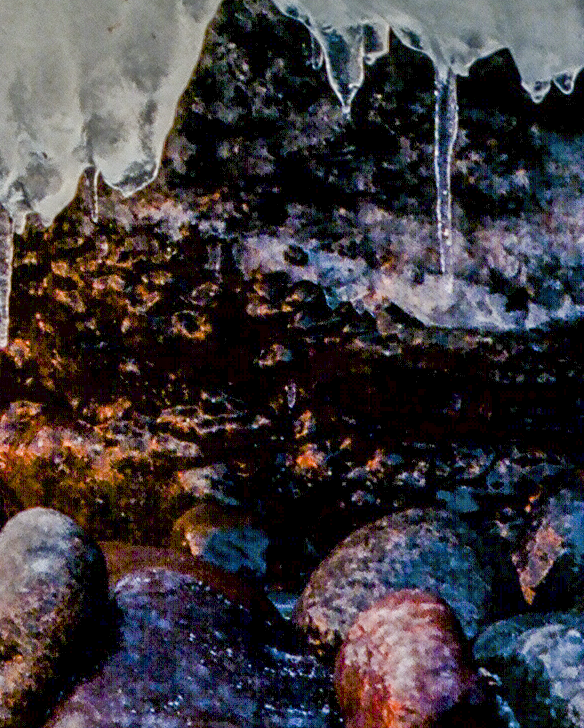
There’s a tremendous amount of detail hidden in the shadows that can be pulled out if desired. Below is a crop of a small area of the lighter of the high-res scans (#1c), and the image below it shows the detail pulled out of the shadows by cranking up the ‘shadows’ slider in Lightroom. This speaks to the large dynamic range of film – it really is like a raw digital file.
Straight jpeg as delivered:
Shadows slider cranked up:
and below is the maximum detail I could pull out of the darkest of the high-res scans (1b) by pulling the shadow slider all the way up and increasing the exposure a little. Pretty good, but you can see that the scan being darker to start with resulted in some shadow detail that’s just not there. In this case I wouldn’t want to pull the shadows up that much anyway, but you can see that whatever difference there was between how these two were scanned just weeks apart had an impact on the amount of detail data that’s in the image.
On resolution
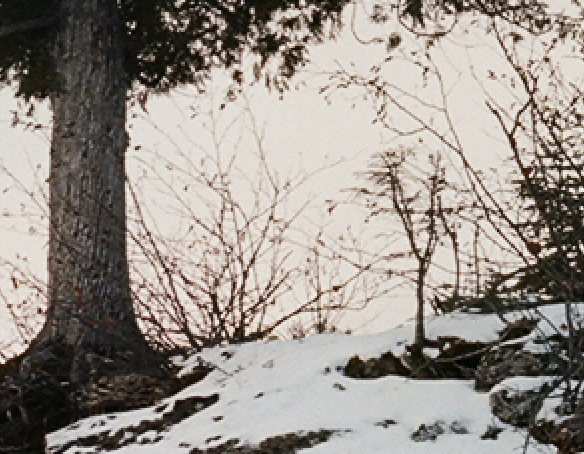
Here’s a crop of part of the very first scan (1a) showing the detail in the budget scan:
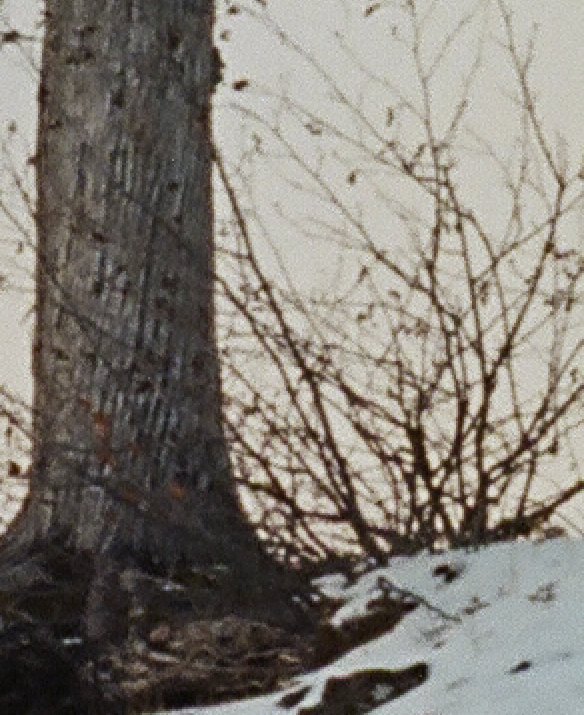
and here’s a crop showing the detail in the enhanced scan (1c):
These are shown at 2:1 scaling so you can see the pixels enlarged. You can see a small amount of jpeg artifacting that shows up in the images, especially at the edges of light smooth areas like the sky, but for the most part the jpg compression isn’t bad, and at normal print sizes would not be noticeable. If the scans were saved as tif files they might be a little better, but not enough to be worth the large file size that would result. These jpg files are around 15mb each, but as a tif would be about 65mb (the jpg files of the budget scans are about 2.5 to 3.5mb each).
I think that’s pretty impressive detail. In some images it seems like you can really see the film grain as opposed to pixels. Keep in mind that this image was shot on Ektar 100, an extremely fine-grained color neg film (the finest-grained color neg film in the world, according to Kodak).
I’d like to show more examples of scans from North Coast, but to keep this post from getting too long, I think I’ll save that for another post (you can see one example of the detail in a 35mm ‘enhanced’ scan from North Coast here). My overall experience with North Coast has been very positive, and I highly recommend their enhanced scans. I’m always looking for scans that might be as good as these but at a lower price, so let me know if you have any recommendations. My first experience with Precision Camera was very impressive, so I want to try them some more – their ultra-high-res scans are done on the same Noritsu scanner at the same resolution, but at a much lower price ($11.99 including developing for C-41 color negs, but with black & white film you don’t get free developing). I’ll post those examples soon.
And I’ll also follow up with some examples from the other labs I’ve used and make some comparisons.



Interesting article Rick and thank you for taking your time of well documenting it. Scanning is indeed a dark art. I don’t have that much experience with scanning color negs but I know scanning 35mm on a flatbed is a bad idea. Maybe it has to do with the lightsource and/or its intensity. I find scanning my b&w negs with a Minolta 5400 and Silverfast a natural aspect of my workflow. I make rough scans, import them in Lightroom and scan the negs I really want to use individually with almost no USM and making sure in the levels panel I get all data. Scans are made in 16-bit TIFF (wish I could scan in DNG). For large format I’m thinking of getting an Epson V800.
Thanks, Stephan. Yes, I think an Epson V700 or V800 would be great for large format film scanning (I don’t shoot large format yet, but maybe someday). I think a lot of people are very happy with the medium format scans from those scanners, too — I’m sure they’re much higher quality than my V500.
I’m astonished by the differences on those three scans of that first shot.
I use Dwayne’s 99% of the time because they strike the right balance between cost and quality. But I feel sure they wouldn’t rewash a negative like North Coast did.
Yes, it is pretty surprising. Typically you’d never know there could be such variation — you just take the scans you get and work with them. I’ve been using Dwayne’s lately more than anyplace else too, mostly because of the price. Though their resolution is not high, the overall quality is great.
p.s. – I’m gonna send a couple more rolls to Precision soon, then I’ll let you know what I think of them.
I think the thing with the pro labs like NCPS is that when you’re a regular customer, they save your preferred color profile so it’s easier for you to get what you want out of their scans. There’s a lab not too far from me that uses a Noritsu scanner, I wish they offered that kind of service and attention. Sadly their scans are always crap.